Categorising and Tagging User Guide
The categorisation or tagging of spend data, is the process of grouping spend data for similar goods and services and assigning them to category structures or other taggable dimensions e.g. normalised supplier or supplier status.
Categorising data, provides visibility into an organisation’s procurement activities and expenditures. It allows the organisation to identify areas for cost reduction and process improvement.
Data can be categorised or re-categorised to any taggable dimensions when using the Rosslyn Data Application. Selected data needs to be identified and filtered, and assigned to the target dimension/category. This process involves the creation of a tagging rule. Once created, rules are submitted for review and approval and will apply to the data based on the conditions in the rule.
Creating a ‘Categorisation / Tagging Rule'
1. Create a report, filtering target data using report options and filters.
2. Select the required target dimension in the Options menu e.g. category.
3. Select the data and use the Create Rule option to open the next window. Complete the required sections and select a target value within that dimension e.g. category level to move the data to.
Note: Categorising or re-categorising rules are submitted for review by an approver via a Rules Management Application. Your Approver will review the rules and filters used to make a decision to either approve or reject the rule.
Justification comments will assist the approver in reaching a decision. In confirming that decision, the approver may add their justification comments.
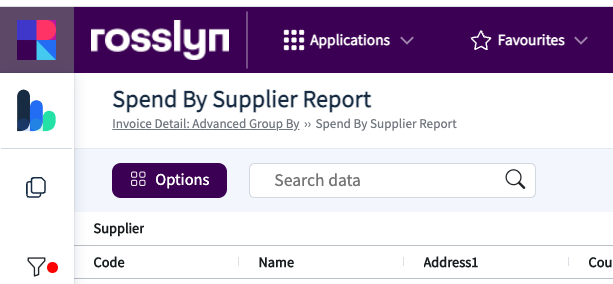
Report customisation and filtering
The first step in filtering the data for tagging is preparing the report with the required data.
In the Data Application, open 'Options'
Here, there is a range of options for selection.
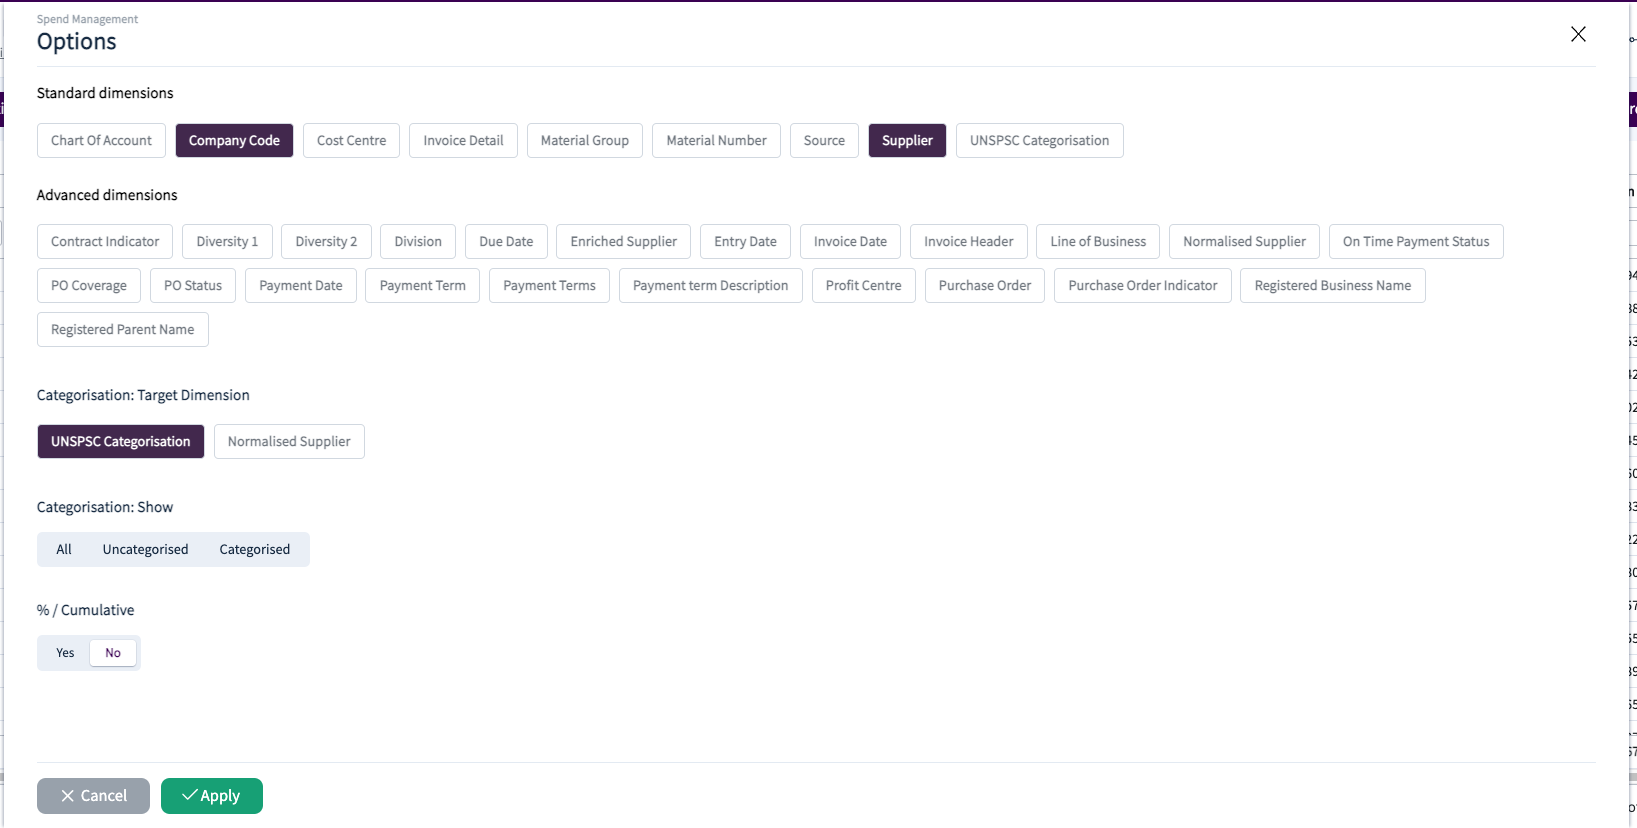
You can select from standard or advanced dimensions. These groups were agreed upon during the onboarding stage, where the dimensions were grouped into frequent (Standard) and less frequently used (Advanced) dimensions.

There are three further options on this screen.
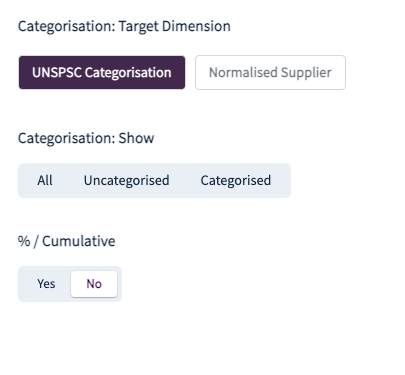
The target dimension option allows you to select a dimension to create rules for e.g. when tagging suppliers to a category, your category dimension would need to be selected here. When a rule is created, the options for that target dimension will be presented.
The categorisation option allows data to be filtered if required to show All data, Categorised or Uncategorised data.
The cumulative option will add a calculated percentage value to the report.
Click 'Apply' to run the report.

Note: You can return to the ‘Options' menu at any time to change the selections
When creating rules, there are two different views that will be displayed, depending on whether you have selected an aggregated or line item view.
Create a Rule
When using an aggregated data report, the Create Rule button will be displayed and can be used to create tagging rules.

Assign All
If the Invoice Detail option has been selected, then an Assign All button will be displayed in the top right section of the grid.
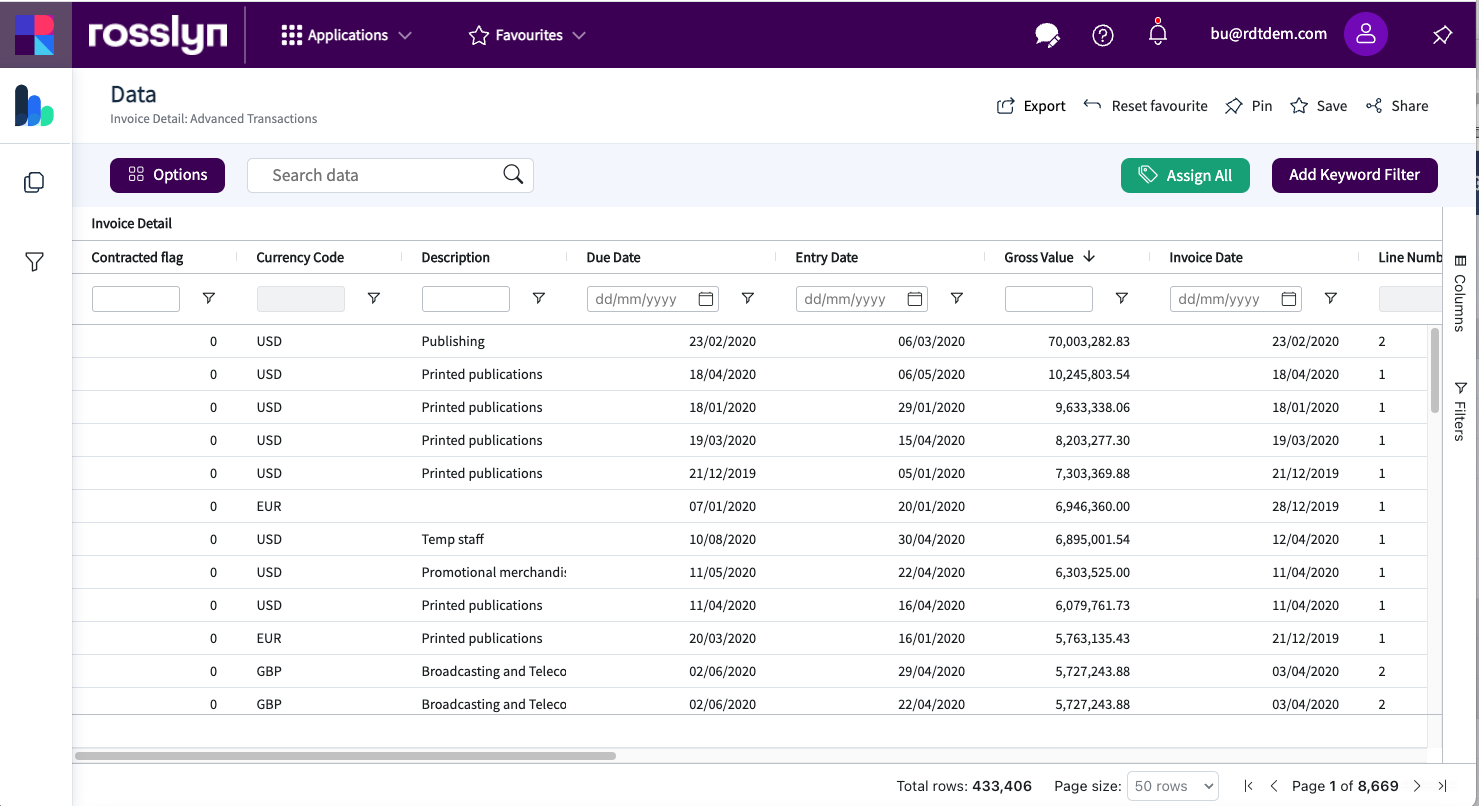
In the example above, the report consists of 433,406 rows of data spread across 8,669 pages. Use the filtering tools to refine the data before creating the rule to ensure you are only selecting the required data.
Using the Assign All button will select all lines within the report and open the Rules Creation window.
The dimension and values that are presented are driven by the settings in the Options menu.
Follow the step by step process within the Rule Creation window.
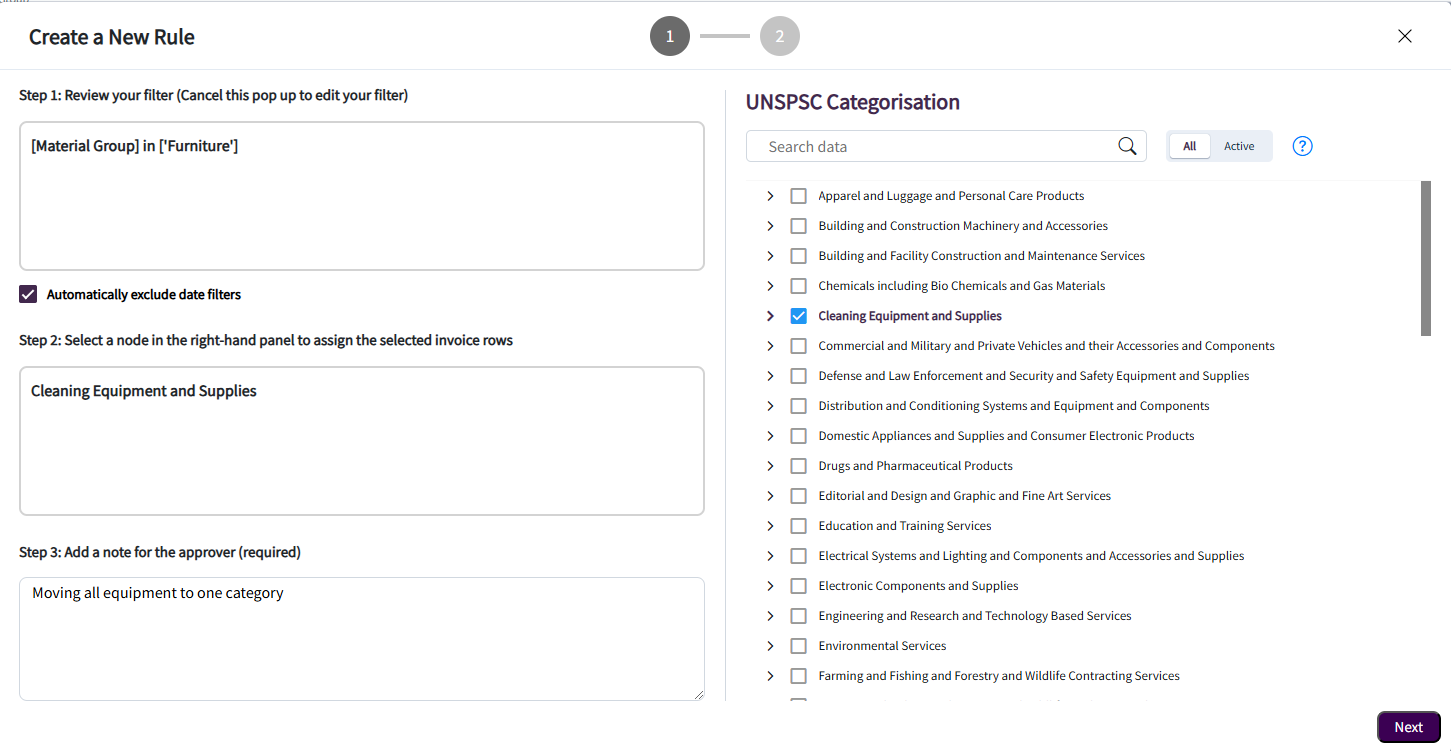
Step 1: Apply Filter
In this step, the filter applied will be displayed. Below this section, a checkbox indicates that, by default, any dates used will be removed to ensure the rule applies to all historical data. To target a specific date range, simply untick this option. If you are uncertain about the filter, cancel the creation process and revisit Data Mining to modify the filter.
Step 2: Category Selection
After selecting a category on the right-hand side, Step 2 will display the chosen category.
Step 3: Enter Justification
Provide a justification for the rule to help the approver understand the reasoning behind the rule's creation.
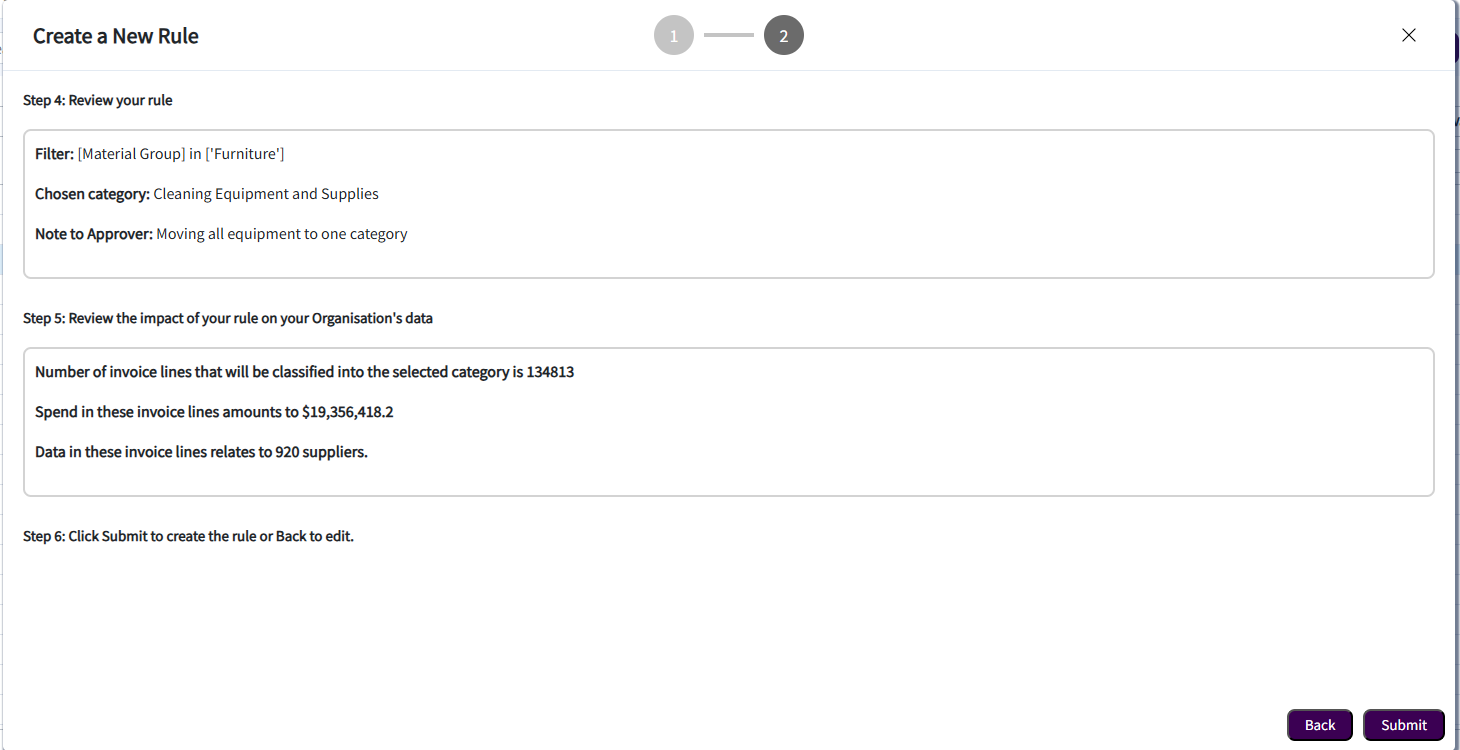
Step 4: Rule Review
Review the rule to ensure it is as expected. If any changes are needed, you may either cancel the creation process or click "Back" to adjust the categorisation.
Step 5: Impact Assessment
Review the impact assessment, which outlines how the rule will affect the selected data. The "Invoice Lines" refers to the number of lines selected or of the same type. Note that this number may be higher than the report data if date ranges are removed.
Step 6: Submit
Click "Submit" to finalise the rule. The rule will run immediately upon approval or according to your organisation's settings.
Note: The rule will be sent to the Rules Management Application where your approver will review the rule and make a decision to Approve or Reject it.