Client Administrators User Guide
Client Administrator user types have enhanced ‘permissions’ to manage roles and user accounts for their organisation. This guide will focus on the two main areas of client administration:
- Roles
- User Accounts
Client Administration Screen
Access the Client Administration screen, by clicking on the profile icon in the top left side of the screen.

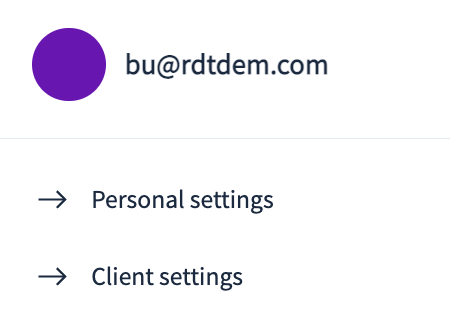
Users will have access to ‘Personal settings’ where they can change their password, etc.
Users allocated the role of ‘Client Administrator’ will have access to ‘Client settings’.
Click on ‘Client settings’ to open the ‘Edit Client’ window where administration tasks can be completed.
Certain areas within this window are non-editable and are for Rosslyn staff only. Contact your Rosslyn CSM to discuss any changes to these fields.
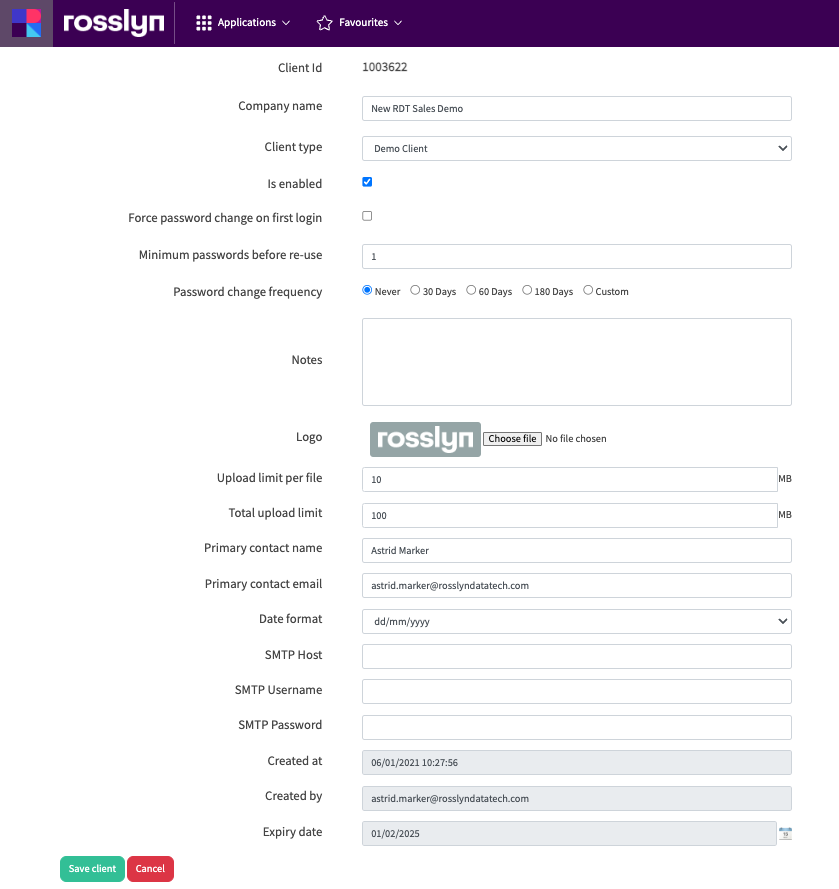
Client Details Screen
The three main areas on this screen are:
- Force password change on first login
- Will force users to change their password after their first login. This is good practice.
- Minimum passwords before re-use
- A minimum number of times a password can be used before it is re-used. This can be increased to match your company policy if required. This is good practice.
- Password change frequency
- Your organisation may have an IT security protocol in place. You can set the forced password change frequency by checking the appropriate box.
Roles Screen
This screen contains the roles within the Rosslyn Platform. As a Client Administrator, you can create roles, delete roles, allocate features/applications to roles, and allocate users to role types.
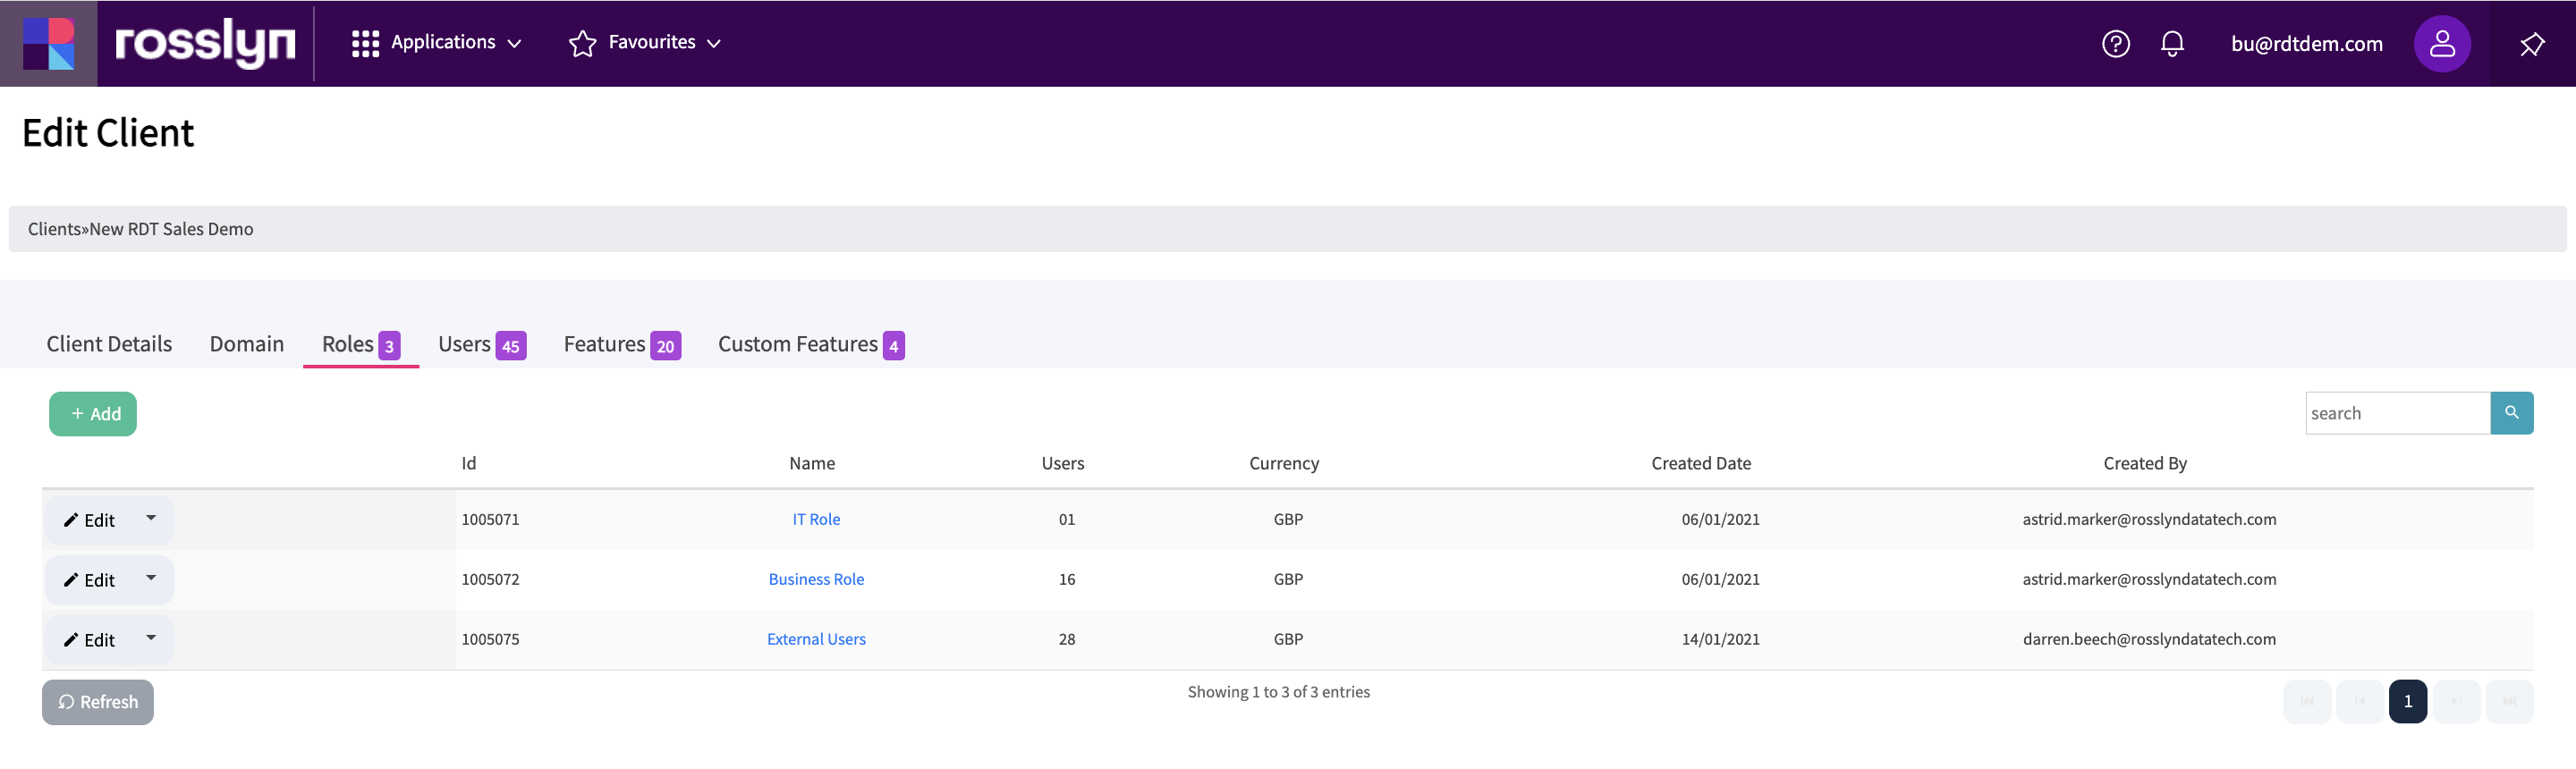
Click the Edit button allows you to see the users in that role and the allocated features.

Click the role name to open the ‘Edit Role’ window.
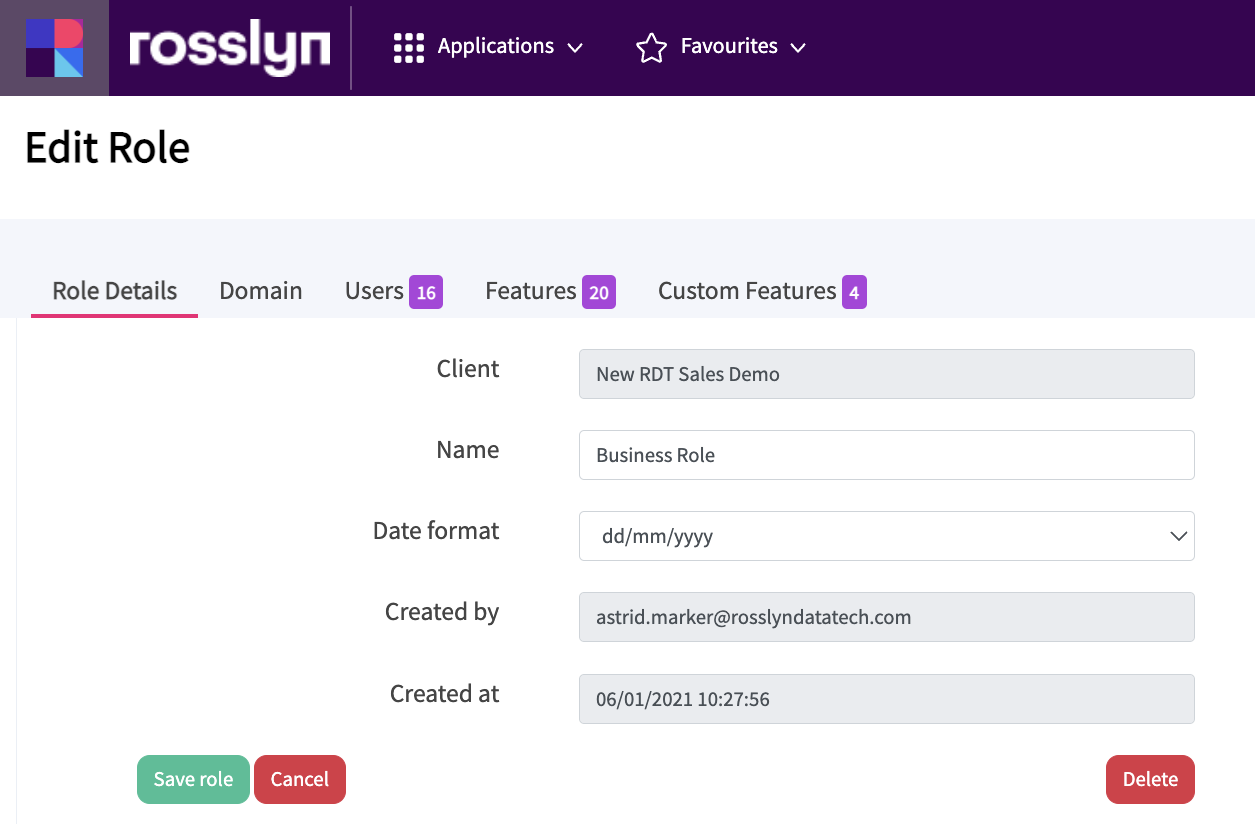
After editing the fields, select ‘Save role’ to apply any changes. Select ‘Cancel’ to return to the previous screen.
To create a new Role, in the ‘Roles’ screen select the 'Add button button.
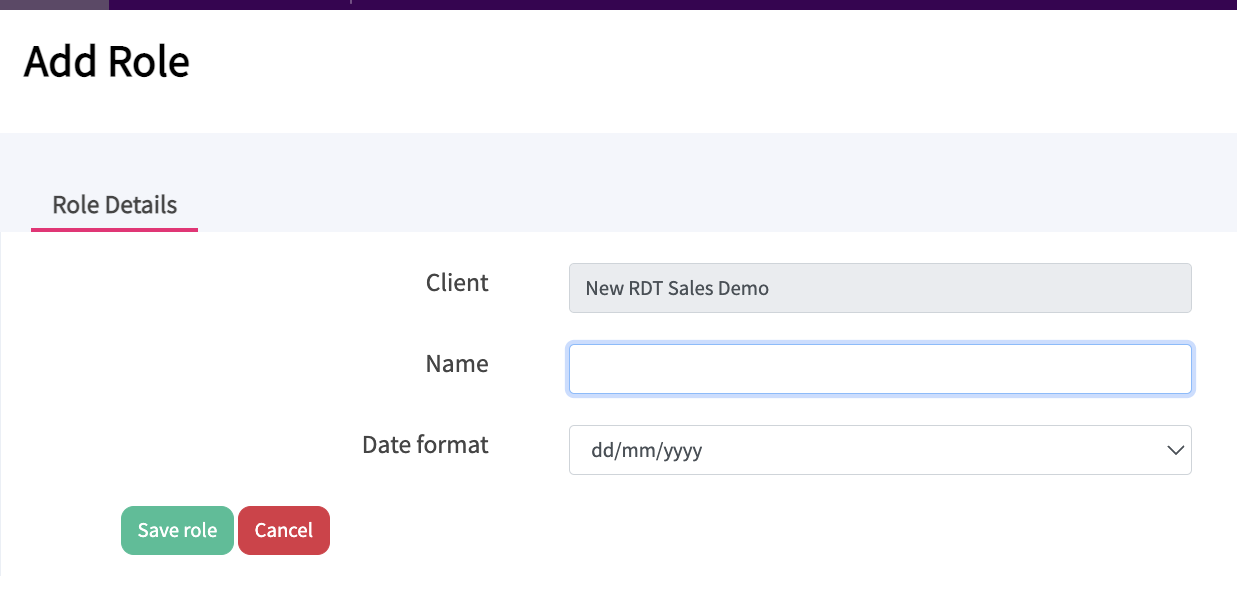
Enter a role name and select the date format from the options in the dropdown. US-based users can be set use the mm/dd/yy format if required. Select the ‘Save role’ button to action.
The ‘Edit Role’ screen will then be displayed for the new role.
Various tasks can be completed in this screen associated with the role:
- Add Users to the role using the ‘Users’ tab
- Add Features/Applications to the role using the ‘Features’ tab
- Add Custom Features to the role using the ‘Custom Features’ tab
Once any tasks have been completed on this screen select the save role or cancel or delete buttons.
Users Screen
Click the ‘Users’ tab to open the Users screen to see a list of users.
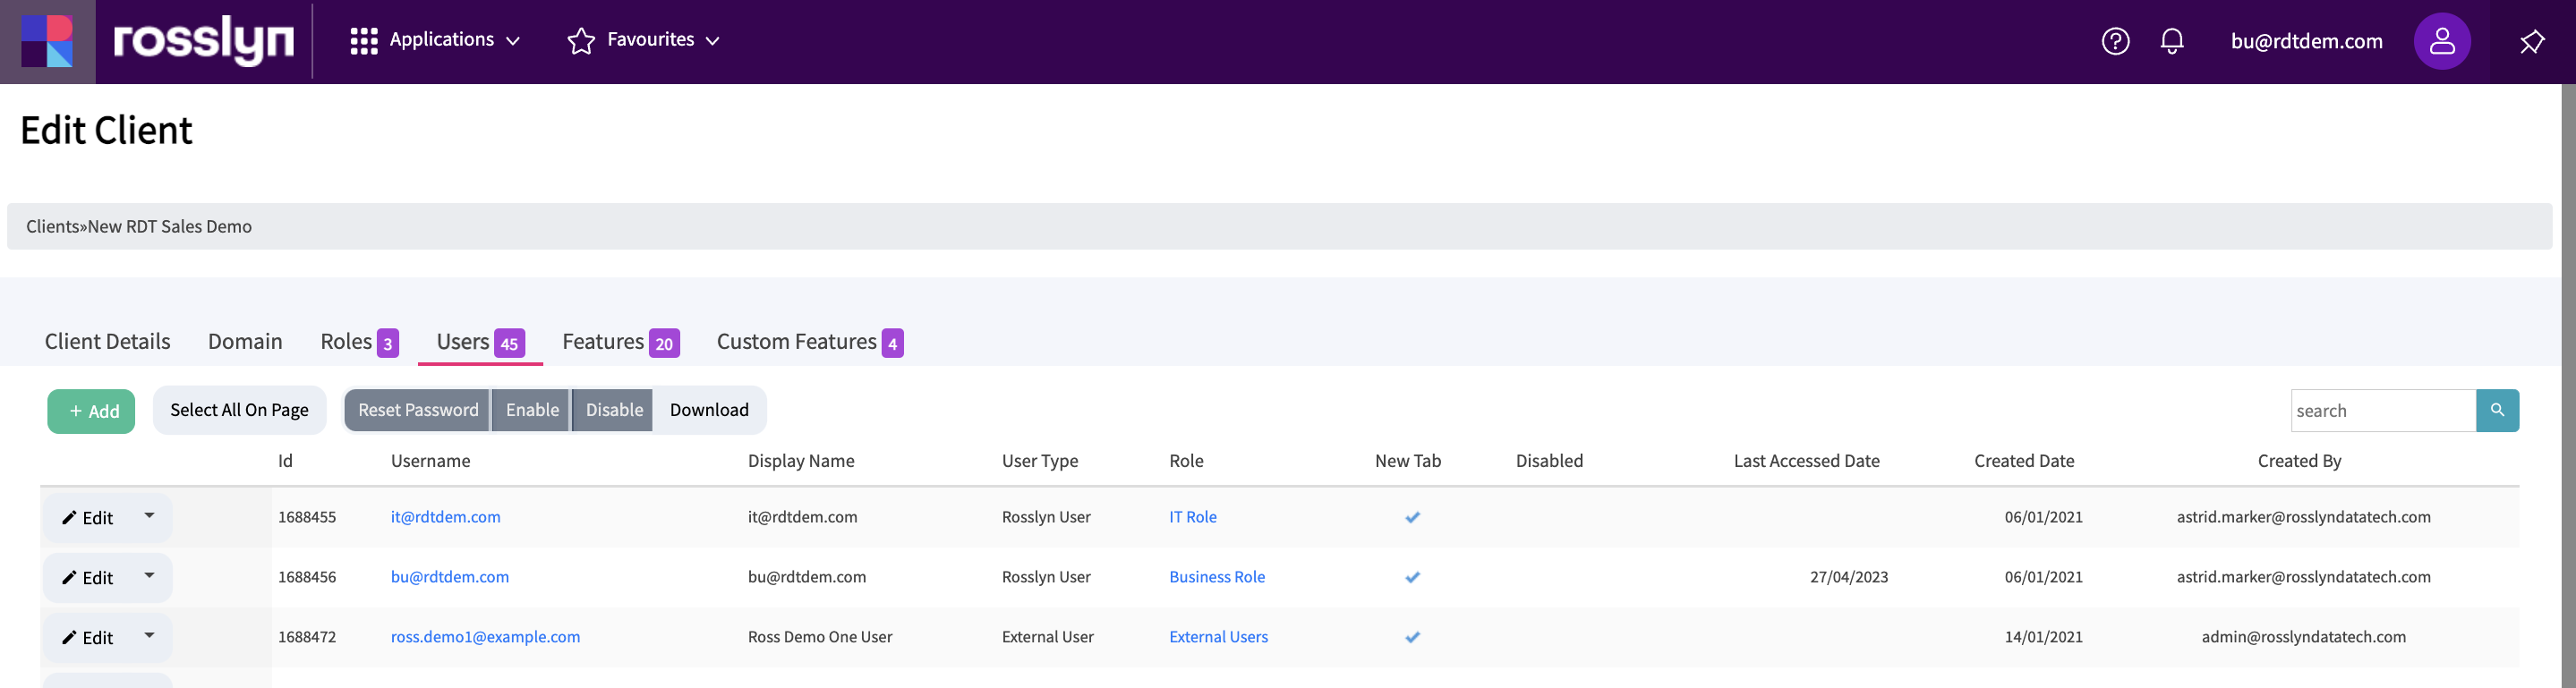
In the above example, there are 45 user accounts.
A common action is to enable a disabled user account that has been locked. Normally because a user has failed to log in correctly or forgotten their password. Disabled accounts will have a blue tick in the ‘Disabled’ column.
Client Administrators can use the ‘Edit’ function for each user accounts. Click the Edit icon to open the menu.
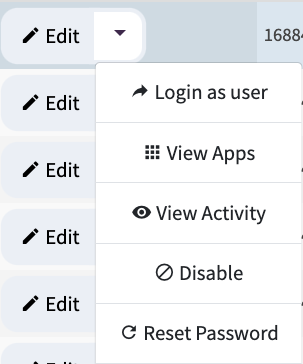
Client Administrators can:
- Login as this user
- View the Features/Applications allocated to users
- Enable/Disable the accounts
- Reset passwords
Add a new user
Use the Add button in the User tab to start the process.
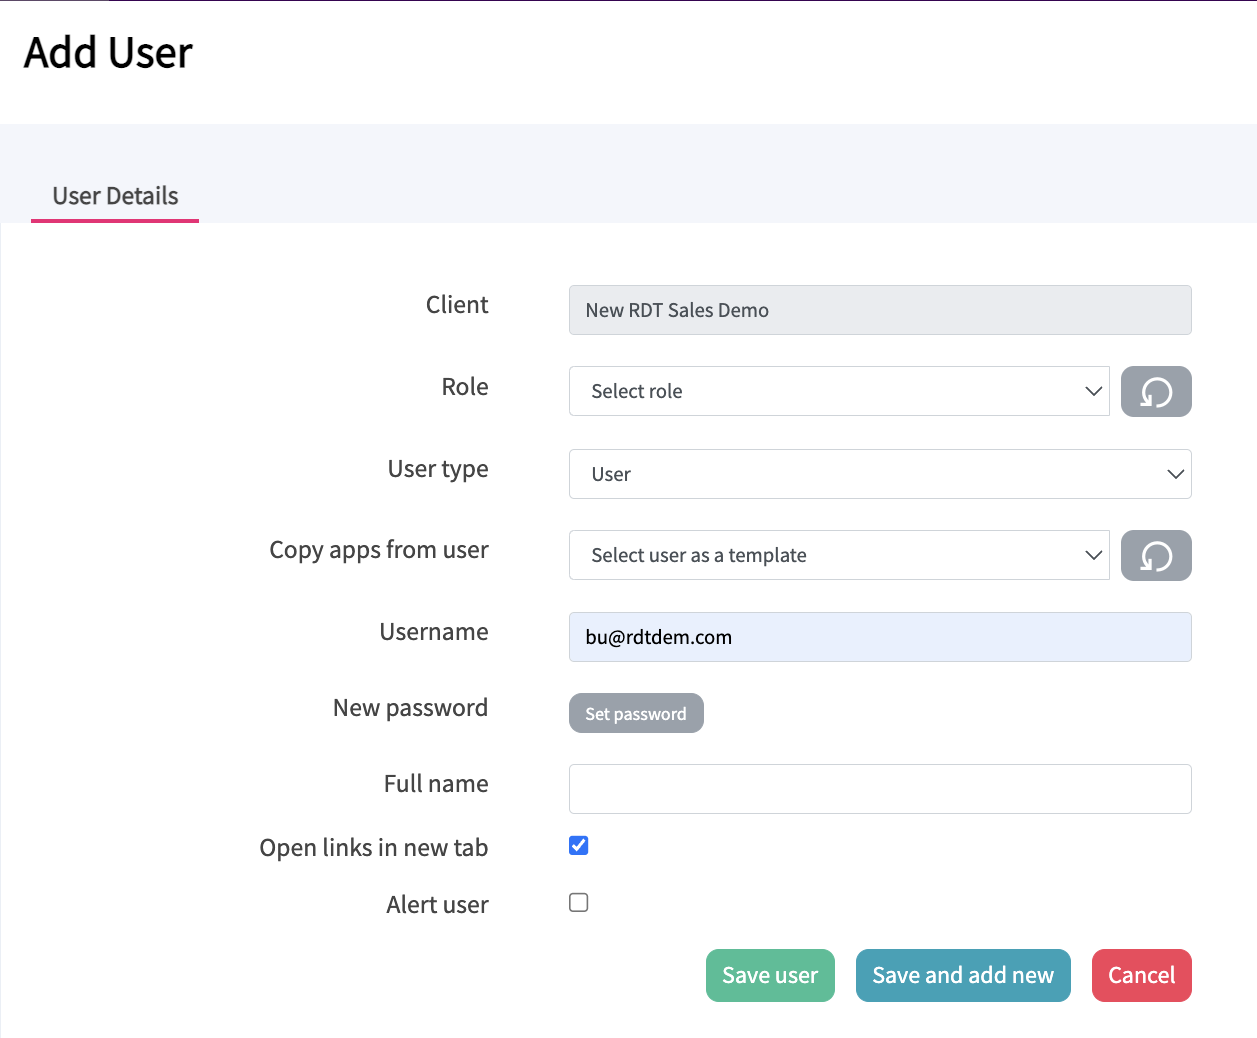
- Select a Role from the role dropdown menu
- Select a User type from the user type dropdown
- In the ‘Copy Apps from user’ box use the dropdown list to select a current user's Features/Applications to use as a template for the new user. When selecting a user, all Features/Applications allocated to that user will be automatically allocated to the new user.
- Enter the Username (normally their business email address)
- The Set password option can be used to manually allocate a password or skip this option and using the Alert User option will send an auto-generated password.
Important note: Passwords for this environment will need to contain at least: ·
Two uppercase letters
Two lowercase letters
Two numeric characters
Two special characters
- Enter the full name (this will appear in the user list as part of their user account details)
- ‘Open links in new tab’. - not applicable
- ‘Alert user’ – check if you want a message to go to the user with a no-reply email containing their credentials.
- Either select Save user to close or Save and add new to add another user.
- On selecting either of the save options, the ‘User Details/Apps’ screen will open automatically.
- In the User Details screen, check the Client details, allocated Role and User Type are correct.
- Check the Username has been entered correctly.
- In ‘Your password’ enter the password you use to access the Rosslyn Platform as a Client Administrator user.
- Click Save to action.
Note: If you have not used a current user account as a template to copy Features/Applications, you will need to go to the ‘Apps’ tab.
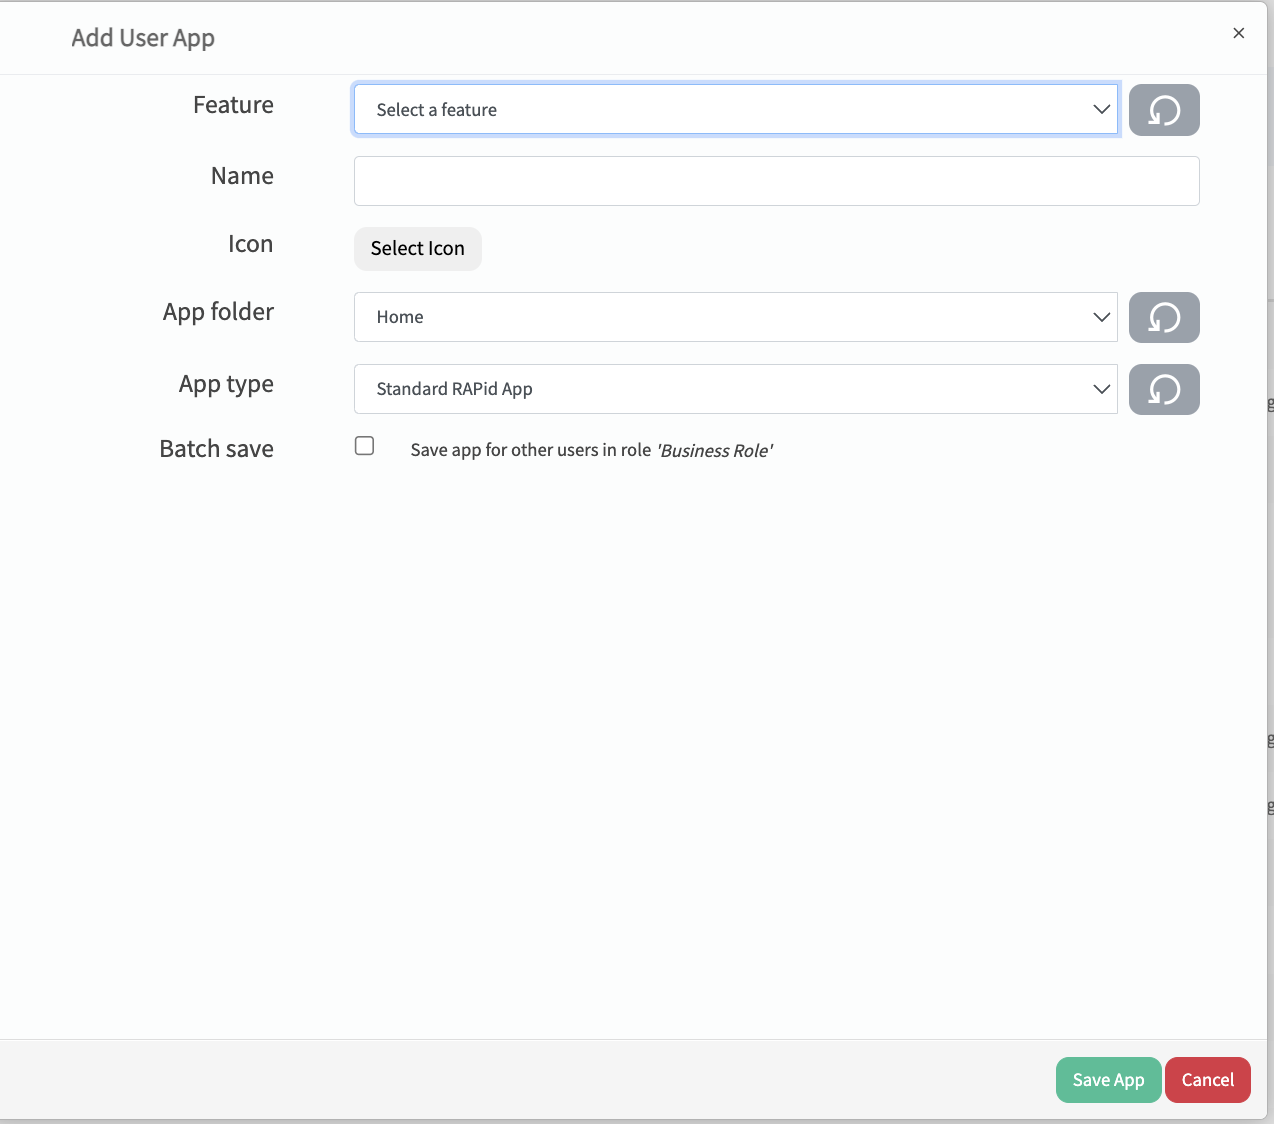
Use this screen to add Features/Applications from the relevant dropdown list to the new user and click Save to action.
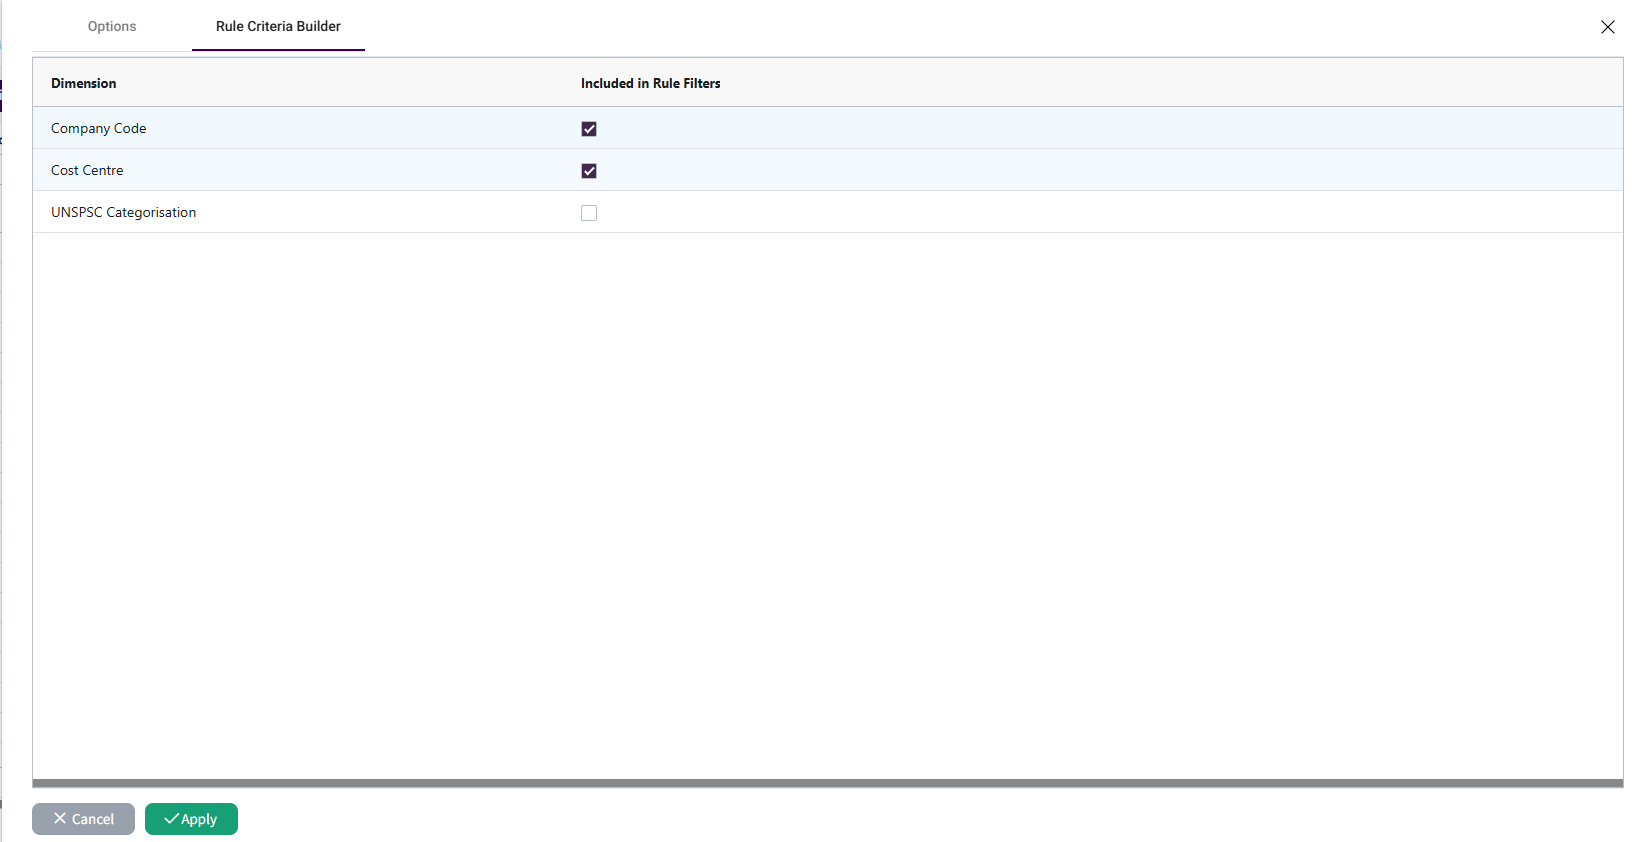
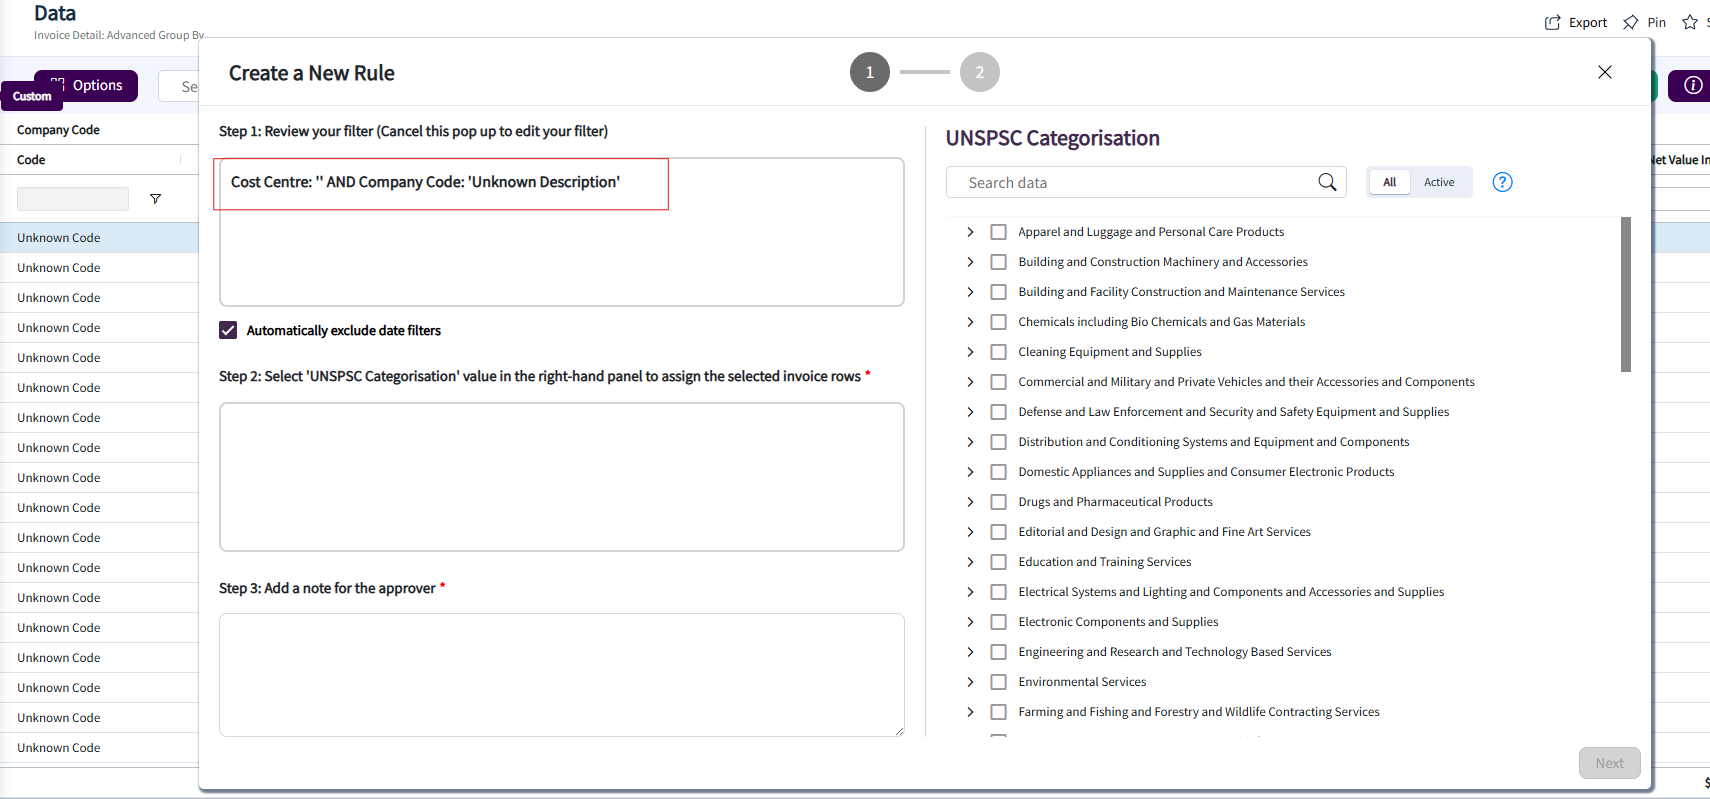
Data Mining Options: Rule Criteria Builder
Within the Options menu in Data Mining you can find another tab called Rule Criteria Builder which allows you to select informational dimensions, that won't be included in the Rule filter but will only be displayed on Data Mining so you can cross check values from other dimensions before you create rules. Out of the selected dimensions you can choose which dimensions you want to include as part of the Rule Filter by simply checking on the checkbox next to them and clicking Apply. You can verify the same by building a Rule after hitting Apply. In the case below UNSPSC Categorisation won't be part of the Rule Filter but the dimension will still be on the page.